Today I'm going to teach you how to make a nice abstract sig in Photoshop.
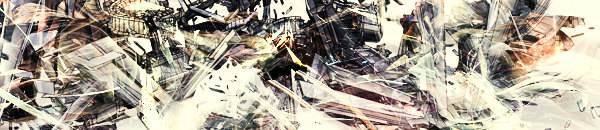
Here's the final result: ___________________________________________________________________Step One.Create a new document in photoshop, 400x130 pixels.Then, Render clouds on this layer. Filter->Render->Clouds[Please note, Your colors need to be black and white. Press D to reset them.]
 Step Two.Pull out your grunge brushes. [ If you have none, try here. http://www.DeviantART.com ] Create a new layer and paint your grunge onto the new layer.Don't make it too dark, or it won't be the exact effect you need. When it's all grunged up, set the layer mode to Overlay.
 Step Three.Do the same as step 2, but this time with a white brush. Make sure to do it on a new layer. Don't forget to overlay this layer, too.
 Step Four.Repeat Steps 2 & 3 Until you have a nice looking background.
 Step Five.Find a render you want to use for your sig. I used a Tifa render. Now, create a new layer, and import your render in.Duplicate this layer twice, so now you have three layers with that image.On the 2nd layer of renders, Do a motion blur. Filter->Blur->Motion Blur. I set the angle to 45 and the distance to 50.
 Step Six.Select the lowest render layer, and on this layer, go to the blending options.Add an Outer glow, with whatever color you feel that works.After doing the glow, Set this layer to overlay. It should look like this:
 Step Seven.Select the third and final render layer. This one should be above the other two. On this layer, Select your render.If you don't know how to do this, in your layers tab, there is a thumbnail of your layer. Hold Control and click that.That should select the render. Then go to Select->Modify->Feather. I feathered it 5 pixels.After the feather, Select the inverse (CTRL + SHIFT + I), then press delete a few times, to give your image a nice look, as if it's blending in.
 Step Eight.There's no step eight, to be honest. All it is is an image to show you what you should be similar to at this point.
 Step Nine.This is where you add color to your image. Go to Layer->New Adjustment Layer->Color Balance.From here you can change the color scheme until you've got a color you like.
 Step Ten.This step is just adding text that you like, and adding a border. You should be able to do that yourself, but if not here's the instructions for the border.Just create another new layer, above the color adjustment, and select the entire canvas. Then do Select->Modify->Contract. Contract it 2 pixels.Select the inverse, and paint that section white. Then deselect all (CTRL + D).Now re-select the entire canvas. Contract it again, but this time 1 pixel. Select the inverse one last time, and paint that section black.You should now have a nice grunge sig.Have fun.~SoulKeepz
Download them? Try http://www.DeviantART.com
I know, i have plenty, i'm just thinking about people who don't!
You should include a link in the tutorial to some!Meh. They can read the comments, though, I'll put it there anyways.
Yay! Another tutorial on how to make the most overused forum signature sytle…
Hoorah, you made a generic, off-the-shelf sig!
Your talent levels rose by 0!No one applauds.Dude… this is overused and old. And your final result isn't that great either :\
It stopped looking nice around Step Five :P